Chambray + embroidery + tassels + shift dress = match made in spring heaven! I walked into Old Navy for new blue jeans (my favorite pair had to be retired, sadly) and had to bring this home with me. It was love at first sight. I instantly knew I wanted to pair it with my espadrille sandals and little bucket bag. I wore this around Charlottesville a couple weekends ago for brunch with my parents and was still comfortable in the 2 hour car ride home. I can't wait to be able to toss this in my weekender bag again with the beach in sight this summer! This bucket bag is my new favorite bag... if you've been following my wish lists over the past two years then you know I've been eyeing a bucket bag for a while now. I could never find something that was just right and within my budget. Then I found this cute little number and I couldn't pull out my credit card fast enough. Hehe - does anybody else get like that over a purse or pair of shoes?! It makes my day!
When it comes to Mother's Day I always think feminine and lush... you want to pamper her and make her feel a little more special than usual! Think about what you would like to receive and then personalize it for your mom! My mom rarely shops or treats herself to something nice so a new purse, a decadent candle, her favorite perfume, or a necklace she can wear every day would make a great gift. You don't have to spend a fortune - pretty gilded notebooks to write down her to-do list, a little copper bunny to hold her ring while she washes her hands, a simple yet elegant frame with a photo of the two of you, or new pillowcase covers to liven up her bedroom for spring. The best part about Mother's Day? Simply spending time with her will be a gift enough (sounds cheesy but trust me, that's all she really wants)! Don't forget to send her a card if you aren't close to home! She can keep it on her desk at work or by her nightstand and think of you :) simple, thoughtful words can mean the most.
I was on the hunt for a couple of work dresses and this color instantly got my attention. It's perfect to wear to a meeting with a client and then toss on some strappy heels for date night! My office gets pretty cold during the day so I knew I needed to add a couple of long sleeve shift dresses to my office wardrobe. It's light enough to withstand summer heat but still hold off a chill. Clearly I'm having a blue phase this summer ;) I've been loving this little Urban Expressions purse! It's perfect to grab and go as well - you can get it for 25% off right now with code UE25FF89N.
I could possibly be the only girl that doesn't know how to use a curling wand. Seriously, ask all of my friends! I travel with two hair tools: my blow dryer and my straightener. When I was a baby I grabbed a hot curling iron with my bare hand and have been scared of them ever since. I also don't like to overpack hair products/things (I save room for shoes) so as a teenager I taught myself how to work my straightener to give me sleek, straight hair and bouncy curls all from the same hot tool. So now... I'm spilling my secrets on how to get perfect curls (ringlets or beach waves) with your trusty straightener - or my newest obsession, the ghd platinum styler! It comes in a neat rolling pouch that has a detachable heat resistant pad to set your straightener on. Along with a rubber end to keep the straightener "closed" while traveling.
First things first - While your hair is wet work in some heat protectant, split end therapy, or blow out balm. Whatever you like the best for your hair type! Then blow out your hair to give some volume to your roots.
Next, give your hair a good coating of hairspray and run a comb through it to get rid of any knots. I part my hair where I wear it every day and split it in half, at the back, putting each side over my shoulder.
Starting at the back of your head grab sections of hair to begin curling. Spray each section you grab with another layer of hairspray (I like a fine mist so that it doesn't look crunchy - I layer on hairspray instead of creating a helmet to hold a curl in place. This makes the curls look more loose and easy instead of "pin curl perfect").
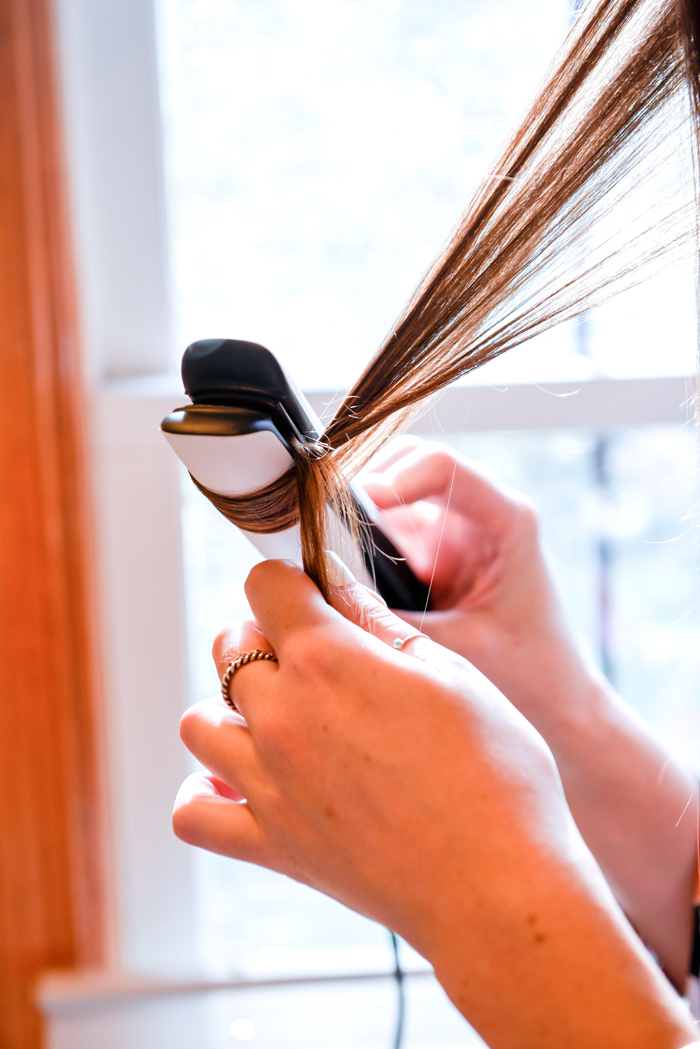
This is where the "flick of the wrist" comes in to play... Place your straightener just like you would normally but then begin rotating it up and towards you. The ends of your hair will then be on the side of the straightener towards your face (because you just rotated it 180 degrees). It kind of looks like it would if you were wrapping your hair around a curling iron but instead you pull the straightener down your hair to distribute heat. You want the hair that's being pulled tight to be in between your face and the loose end of the section - so if you are curling the left side of your face, the ends will fall to the left of the section you're curling (like the photo below). I like to grab the ends to make sure they don't slip out of the straightener as I pull the straightener down my hair and get nearer to the bottom of the section (like the photo above)!
If you want tight ringlets then rotate your straightener even more and pull your hair through slowly. This will reinforce the curl with heat. If you want a loose wave, then pull the straightener down your section more quickly and release the hair before you get to the ends. I also use my straightener just to get wavy ends for work.
Once the section is curled, twist it around your finger and coat it lightly with more hairspray - this helps reinforce the direction you want the curl to go. Don't brush it out yet - let all of the curls cool before finger combing them! Remember, always curl away from your face. But honestly, if your hair won't curl away... who really cares?
Once you finish the first side of curls move on to the next - starting at the back of your head. I've been using the hair clamp (is that what it's called?) to hold the front part of my hair out of the way so I can see the back curls more easily!
When you get closer to the front begin taking smaller sections of hair and alternating the direction you rotate - this will help volumize your hair and make it not form one giant curl. Once you get to the final three sections curl them away from your face to help frame it :) In the three photos below you can see how I rotate my straightener towards me while flipping the ends over the straightener at the same time - pulling my hair through to begin curling away from my face.
Final steps: You guessed it... coat with a fine mist of hairspray and lift at your roots. Loosely brush out your curls with your hands to break up any ringlets (the worst if you want an effortless look) that are lingering so it looks more natural! You can tease your roots to lift any volume and touch up pieces that got missed.
I'd love to know if this was helpful! Do you curl your hair with a straightener? Have you ever tried? What's your secret hair trick? Thanks for reading, y'all! [Disclaimer: I have very fine hair. If your hair is thicker you may need to do my steps in layers :)] See all of the products I like to use over on Snapchat - jennrog3
*This post is sponsored by ghd but all opinions and styling tricks are my own. Thank you for supporting the brands that keep this little blog running!*